

General:
All of our created demos have been developed for the Meta Quest 2 in Air- or Cable Link mode.
Before starting the software, please make sure you have enough space available.
Turn on the Meta Quest headset and then connect it to your computer with the cable.
Confirm all the following prompts with "Yes" or "Allow" (USB Debugging, Data Access, and Link Connection).
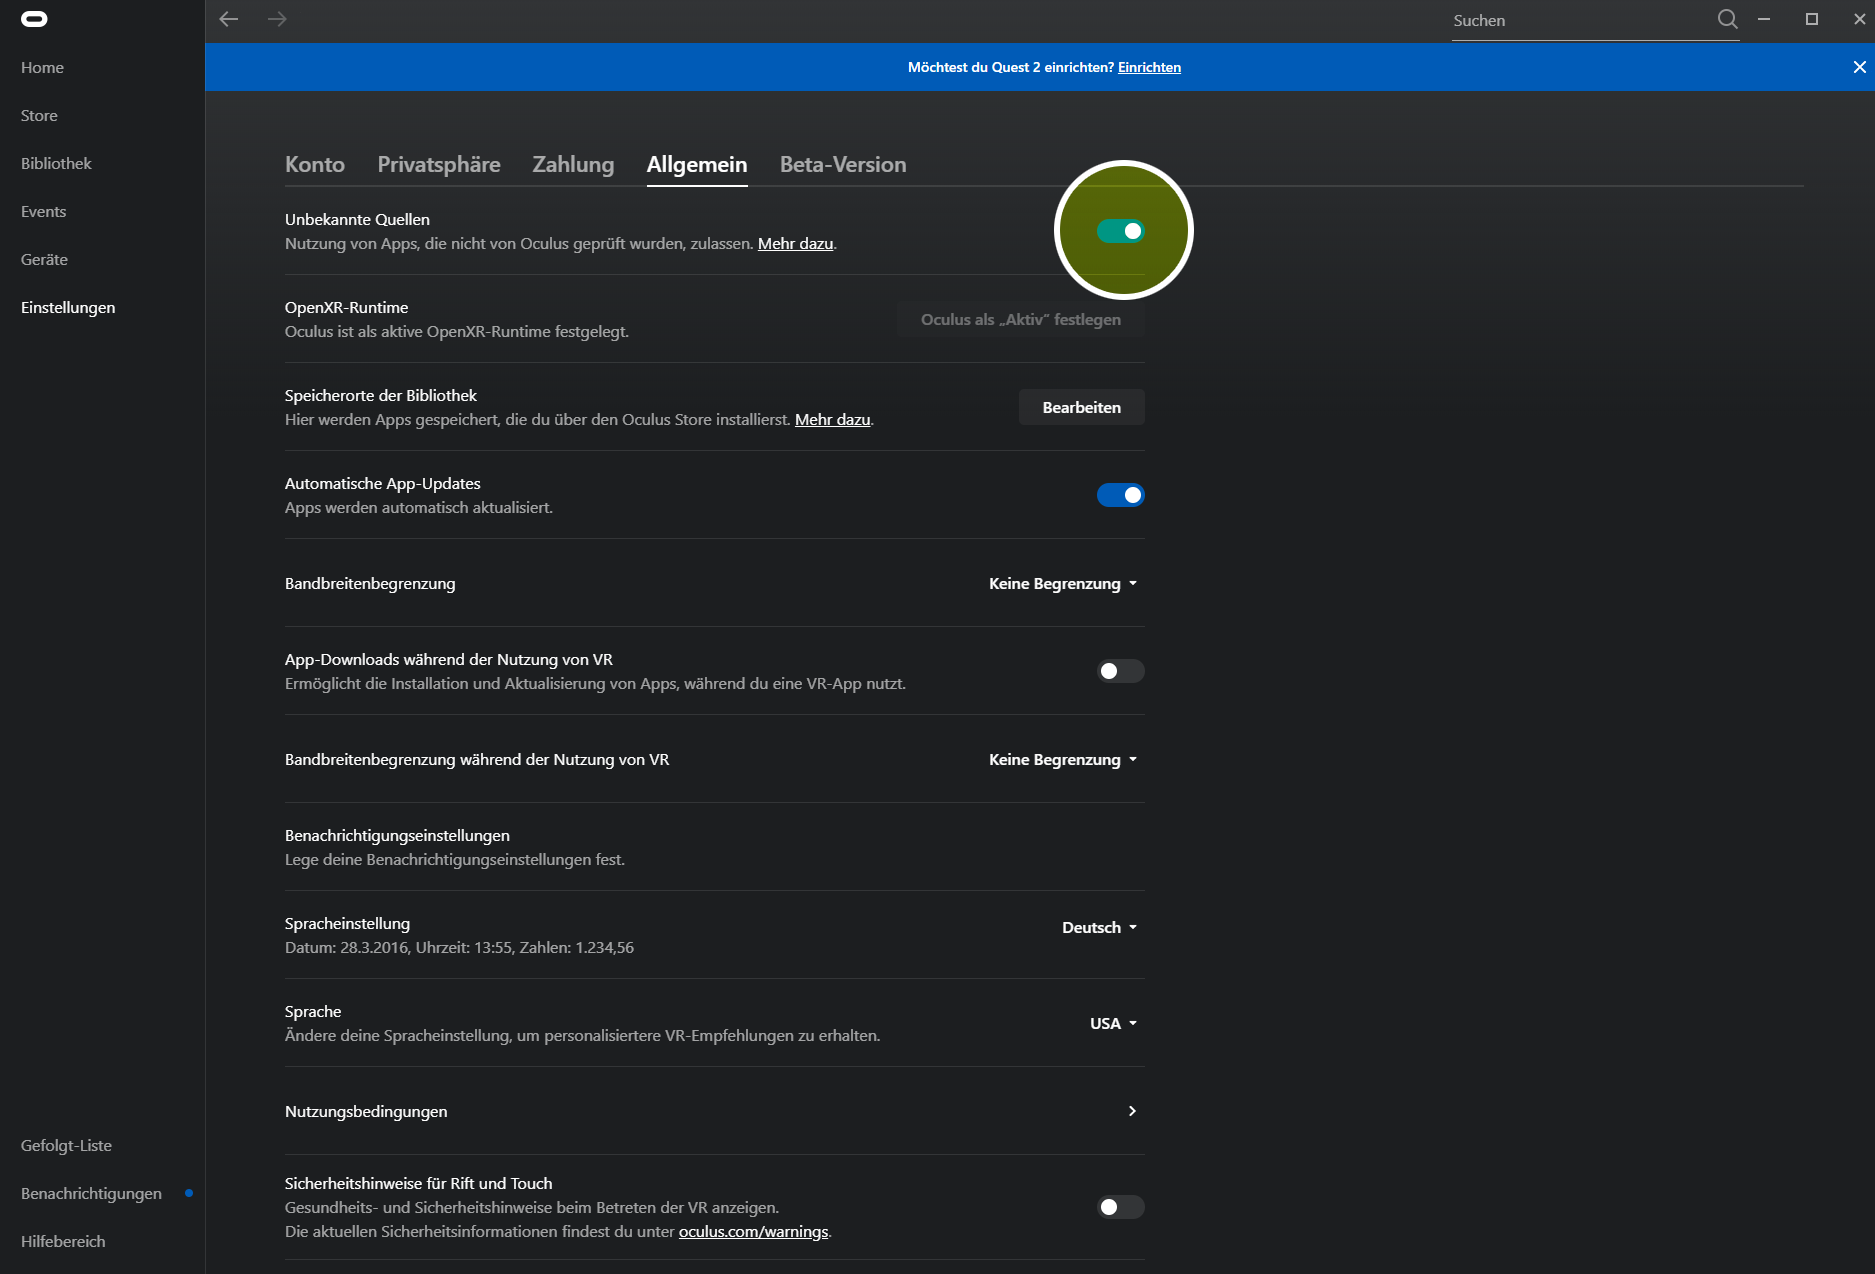
In the Oculus Desktop application, go to "Settings" - "General" and allow "Unknown Sources."
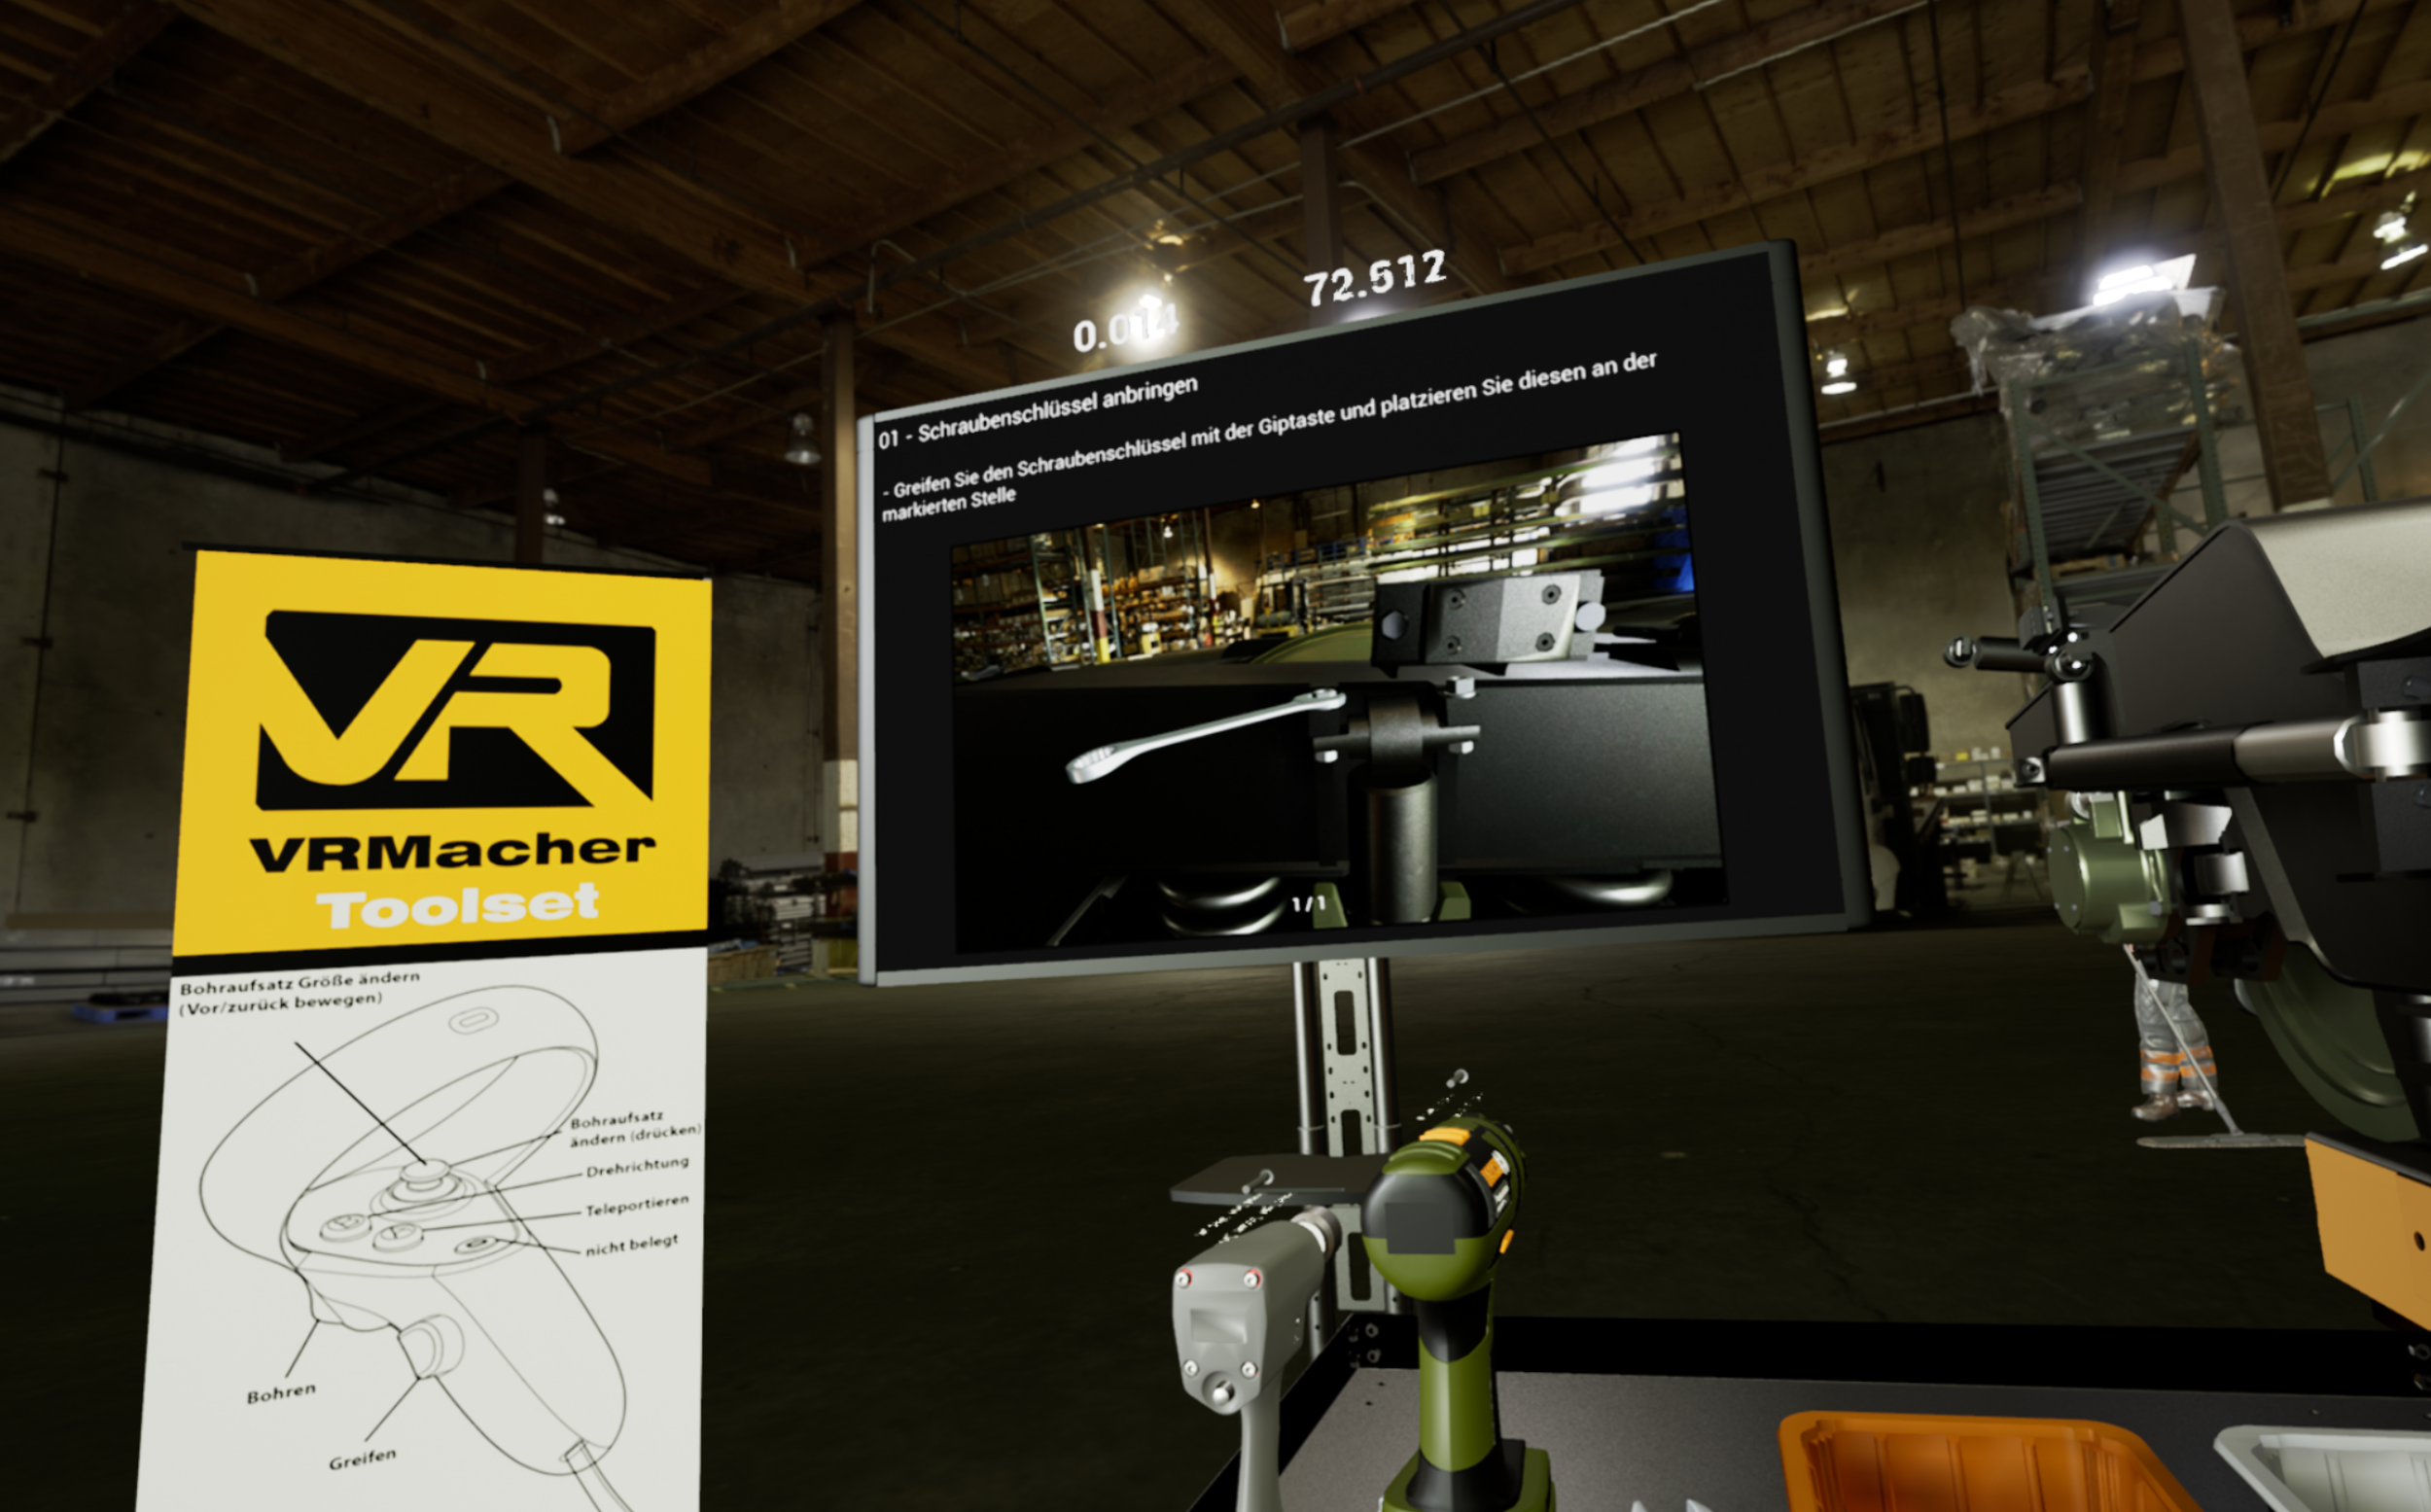
Meta Quest Controller Mapping
Grab objects: Hold the '5' button (Grip button)
Screw drill: Hold the '6' button (Trigger button)
Teleport (movement): Hold the 'A' button
Change drill direction: 'B' button
Change drill attachment: Press '1' (Press the Thumbstick)
Adjust attachment size: Press '1' (Move the Thumbstick forward/backward)
Keyboard Mapping (General)
(Using keyboard commands, a second person can interact with the VR experience from outside.)
Reset position: 'R' key
Quit the application: 'ESC' key
Disable teleporter: 'T' key
Green screw drill: Increase attachment size: 'A' key
Green screw drill: Decrease attachment size: 'Q' key
Green screw drill: Change direction: 'X' key
Green screw drill: Change attachment: 'Y' key
Gray torque wrench: Change direction: 'C' key
Position 1 (repeatedly press the key to cycle through all available stations in the virtual workshop of Section 1): '1' key
Position 2 (repeatedly press the key to cycle through all available stations in the virtual workshop of Section 2): '2' key
Position 3 (repeatedly press the key to cycle through all available stations in the virtual workshop of Section 3): '3' key
Position 4 (repeatedly press the key to cycle through all available stations in the virtual workshop of Section 4): '4' key
Position 5 (repeatedly press the key to cycle through all available stations in the virtual workshop of Section 5): '5' key
Load main menu (level selection): 'H' key
Load chassis level: 'O' key
Load engine level: 'Z' key
Load pump level: 'P' key"

Main Menu
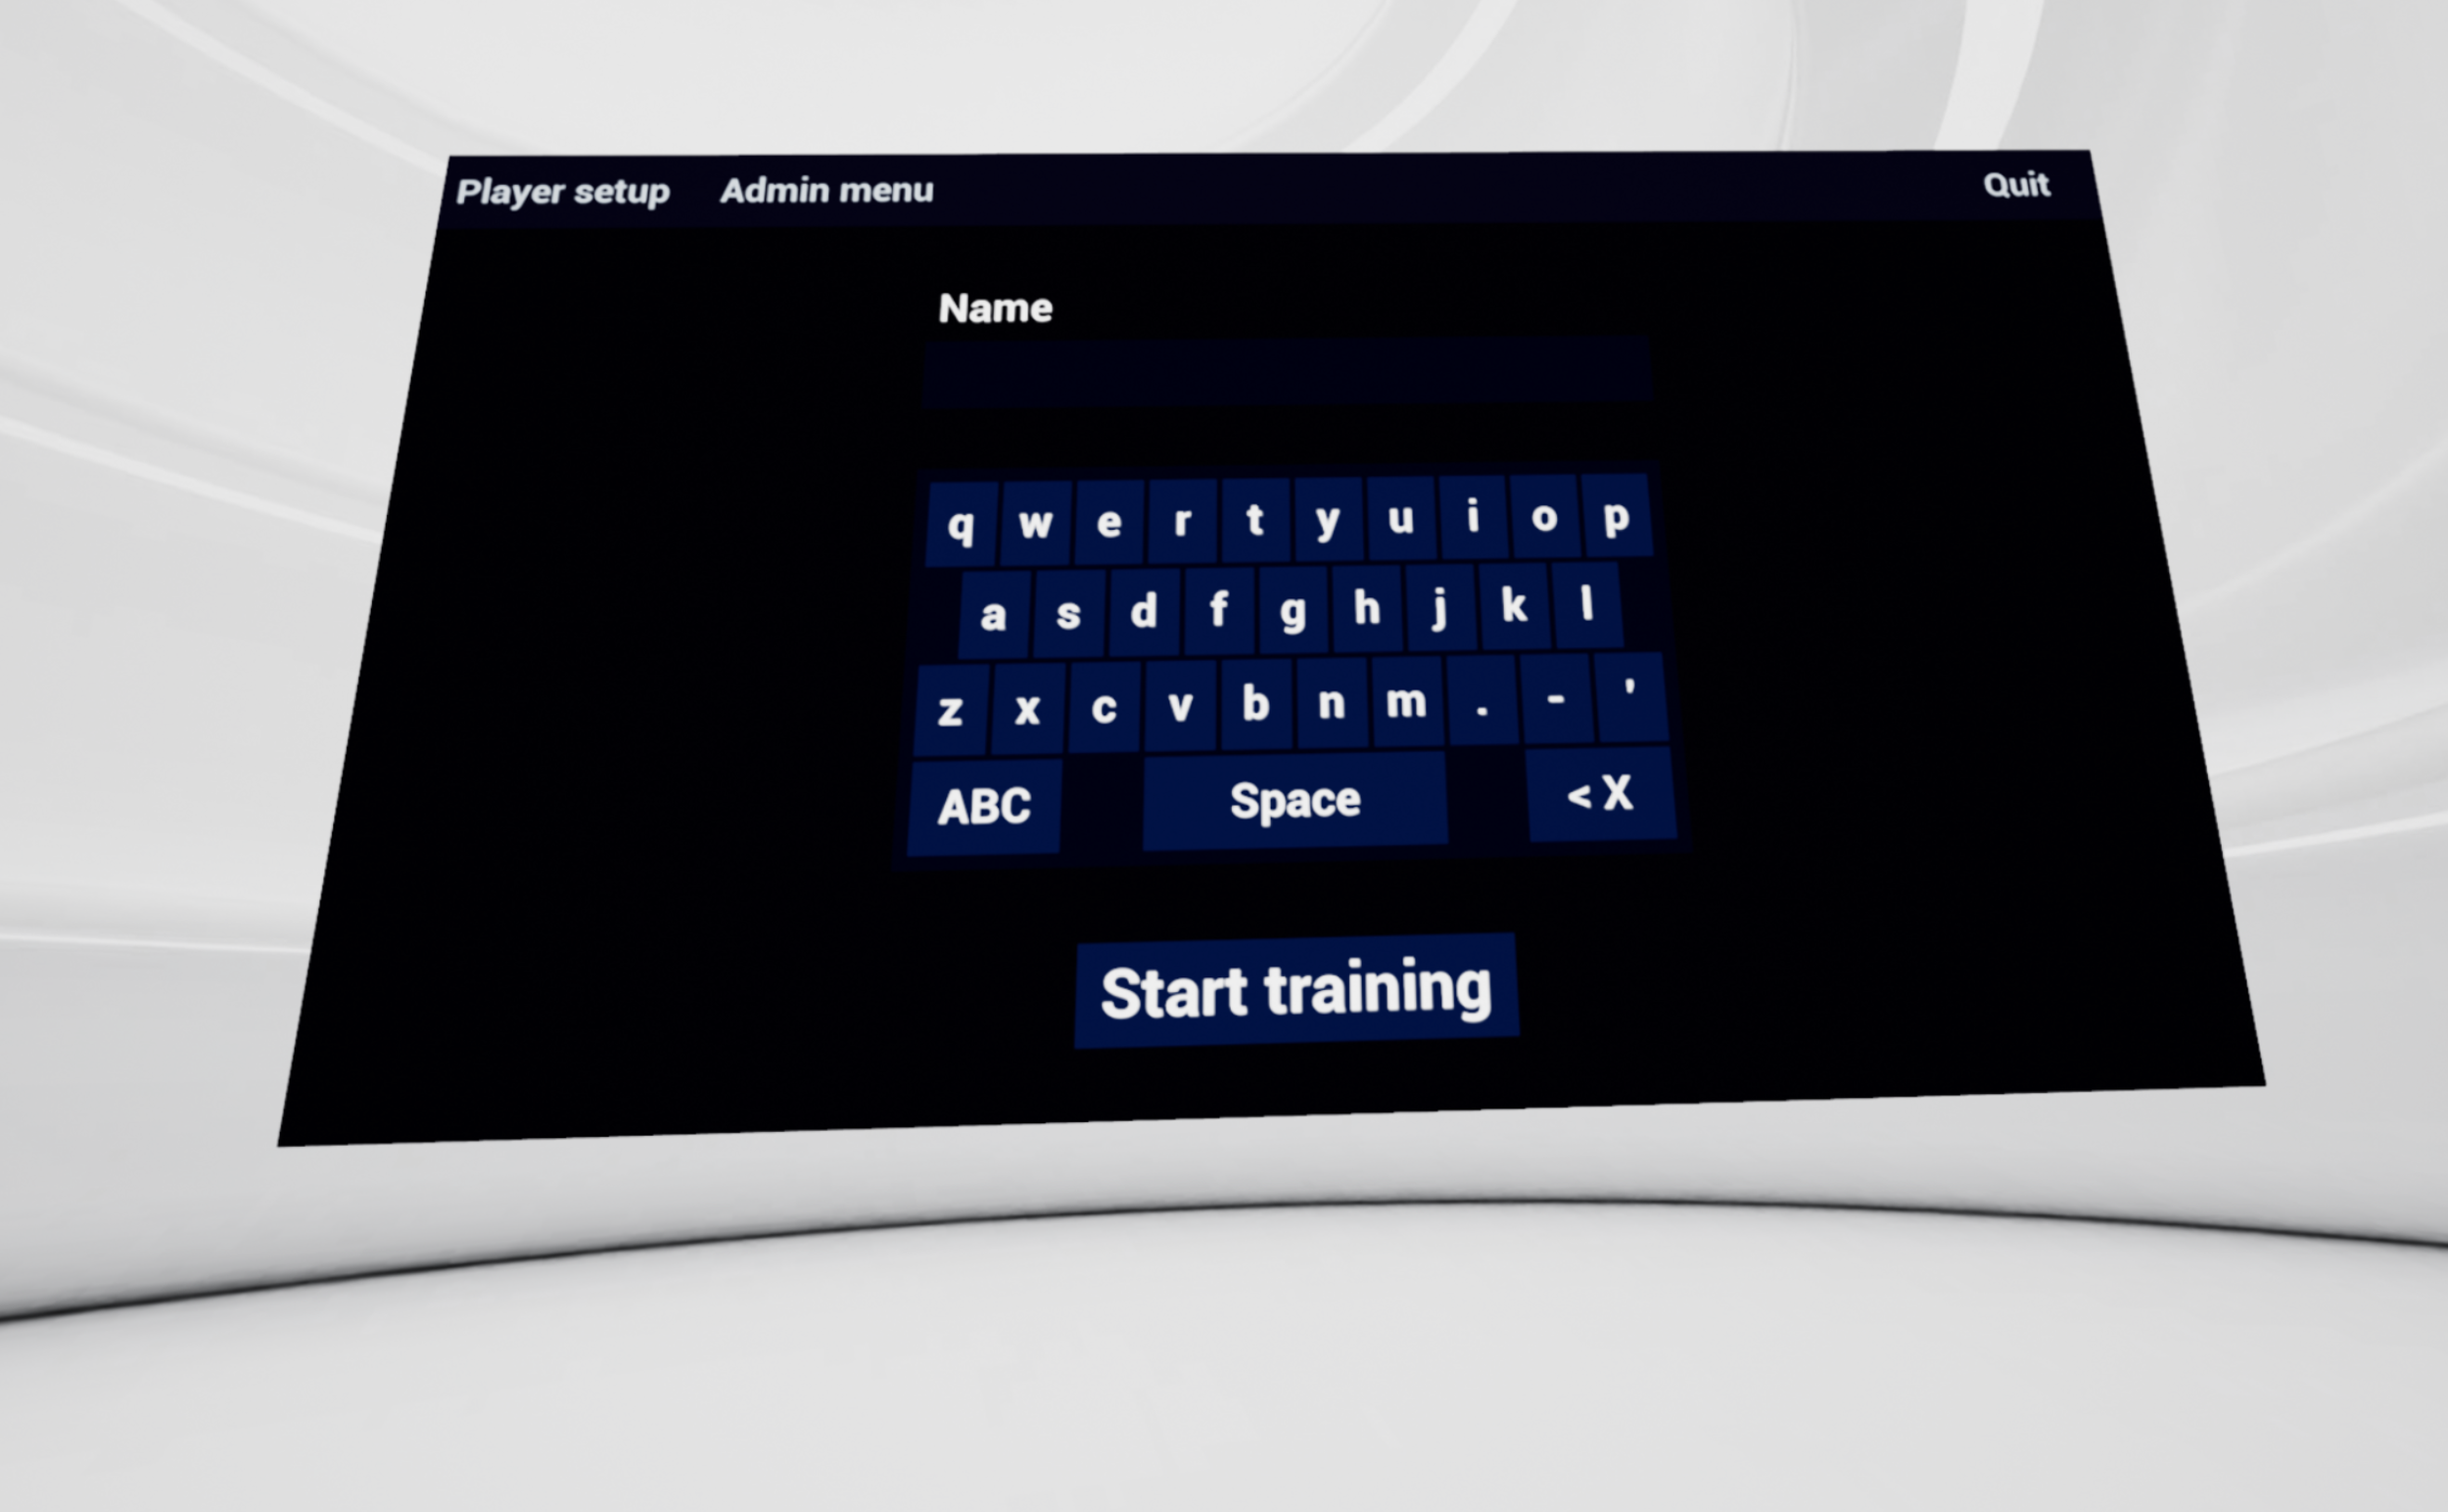
In the main menu, start by entering your name or ID number. Press the "Start Training" button to access the training selection.
The upper selection pertains to the subject area, while the lower selection represents the individual learning modules.
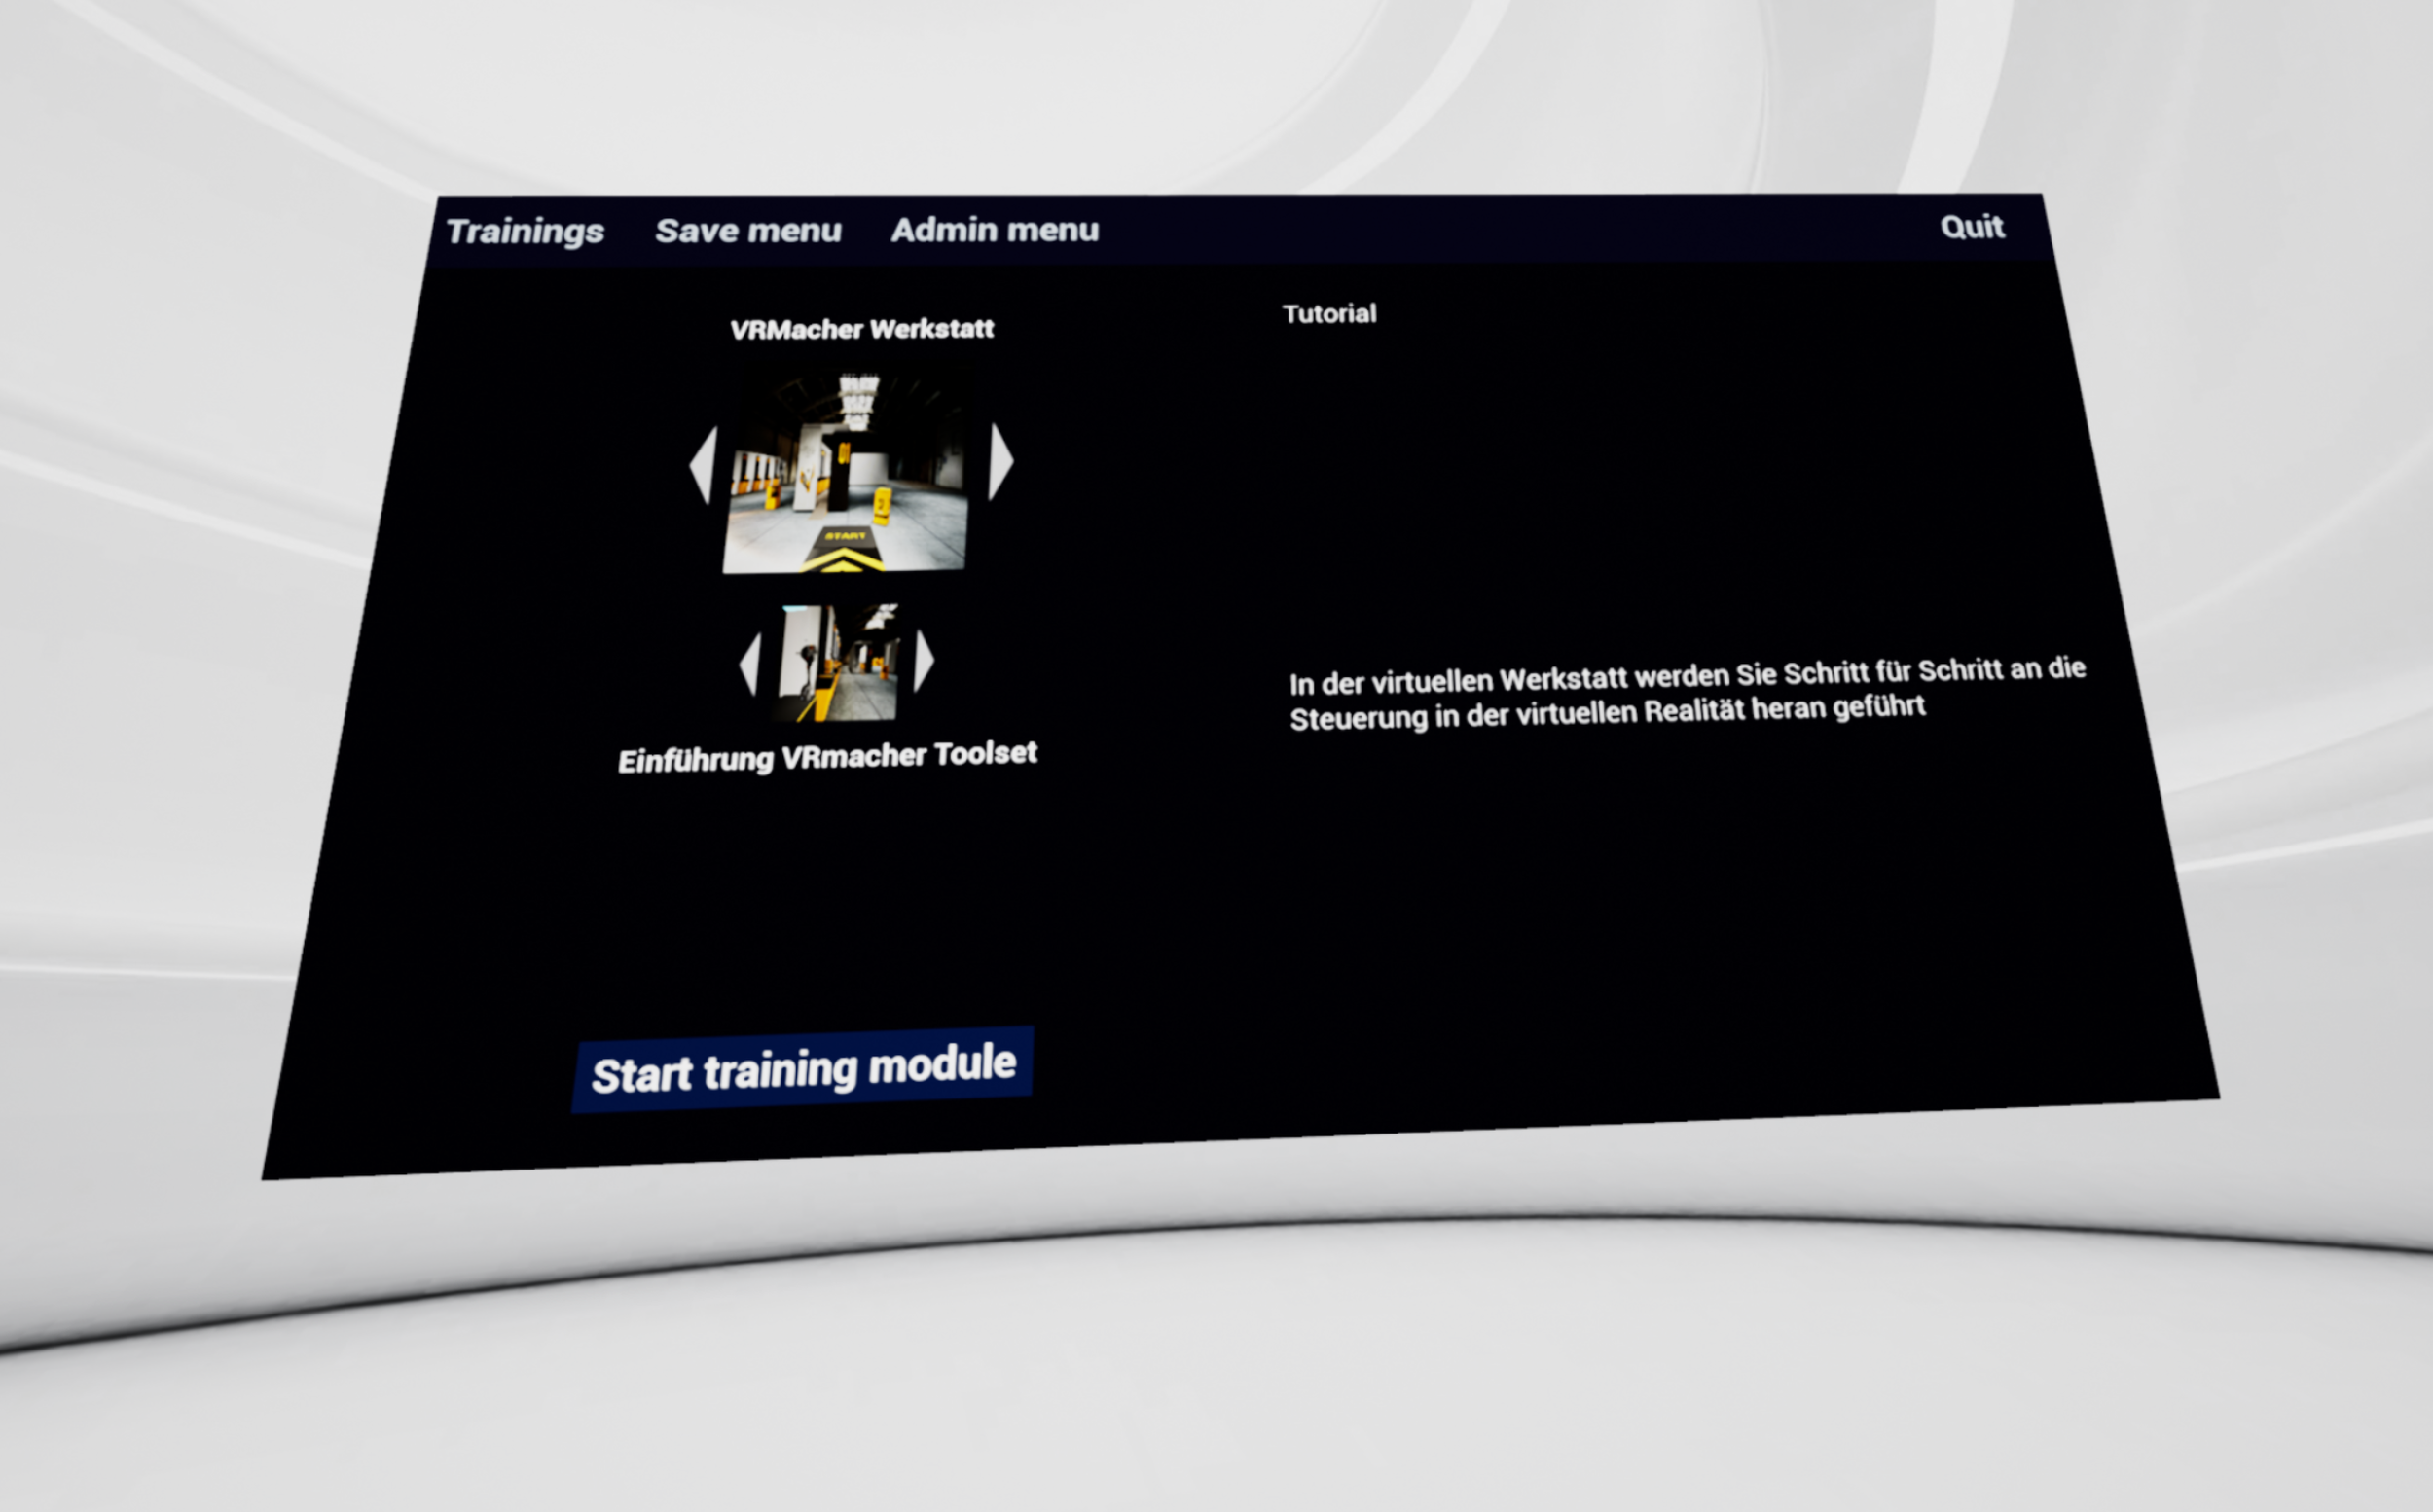
After selecting a learning module using the arrow keys, you can start the training by clicking on "Start Training Module".
VRMacher Workshop

Once in the training hall, you can freely move using the teleport function (Controller button 'A').
Keyboard shortcuts:
Pressing the '1' key:
Will take you to the first station where standard actions like grabbing and placing objects are practiced.
By repeatedly pressing the '1' key on the keyboard, you can navigate through the individual stations of the first module.
Pressing the '2' key:
Takes you to the stations where you will learn how to use the screw drill and other tools.
Pressing the '3' key:
Station three teaches you how to use a hammer, file, saw, riveting machine, and caliper. You can also reach this station through teleportation.
Pressing the '4' and '5' keys:
This will lead you to more elaborate stations that introduce you to the versatility of our application.
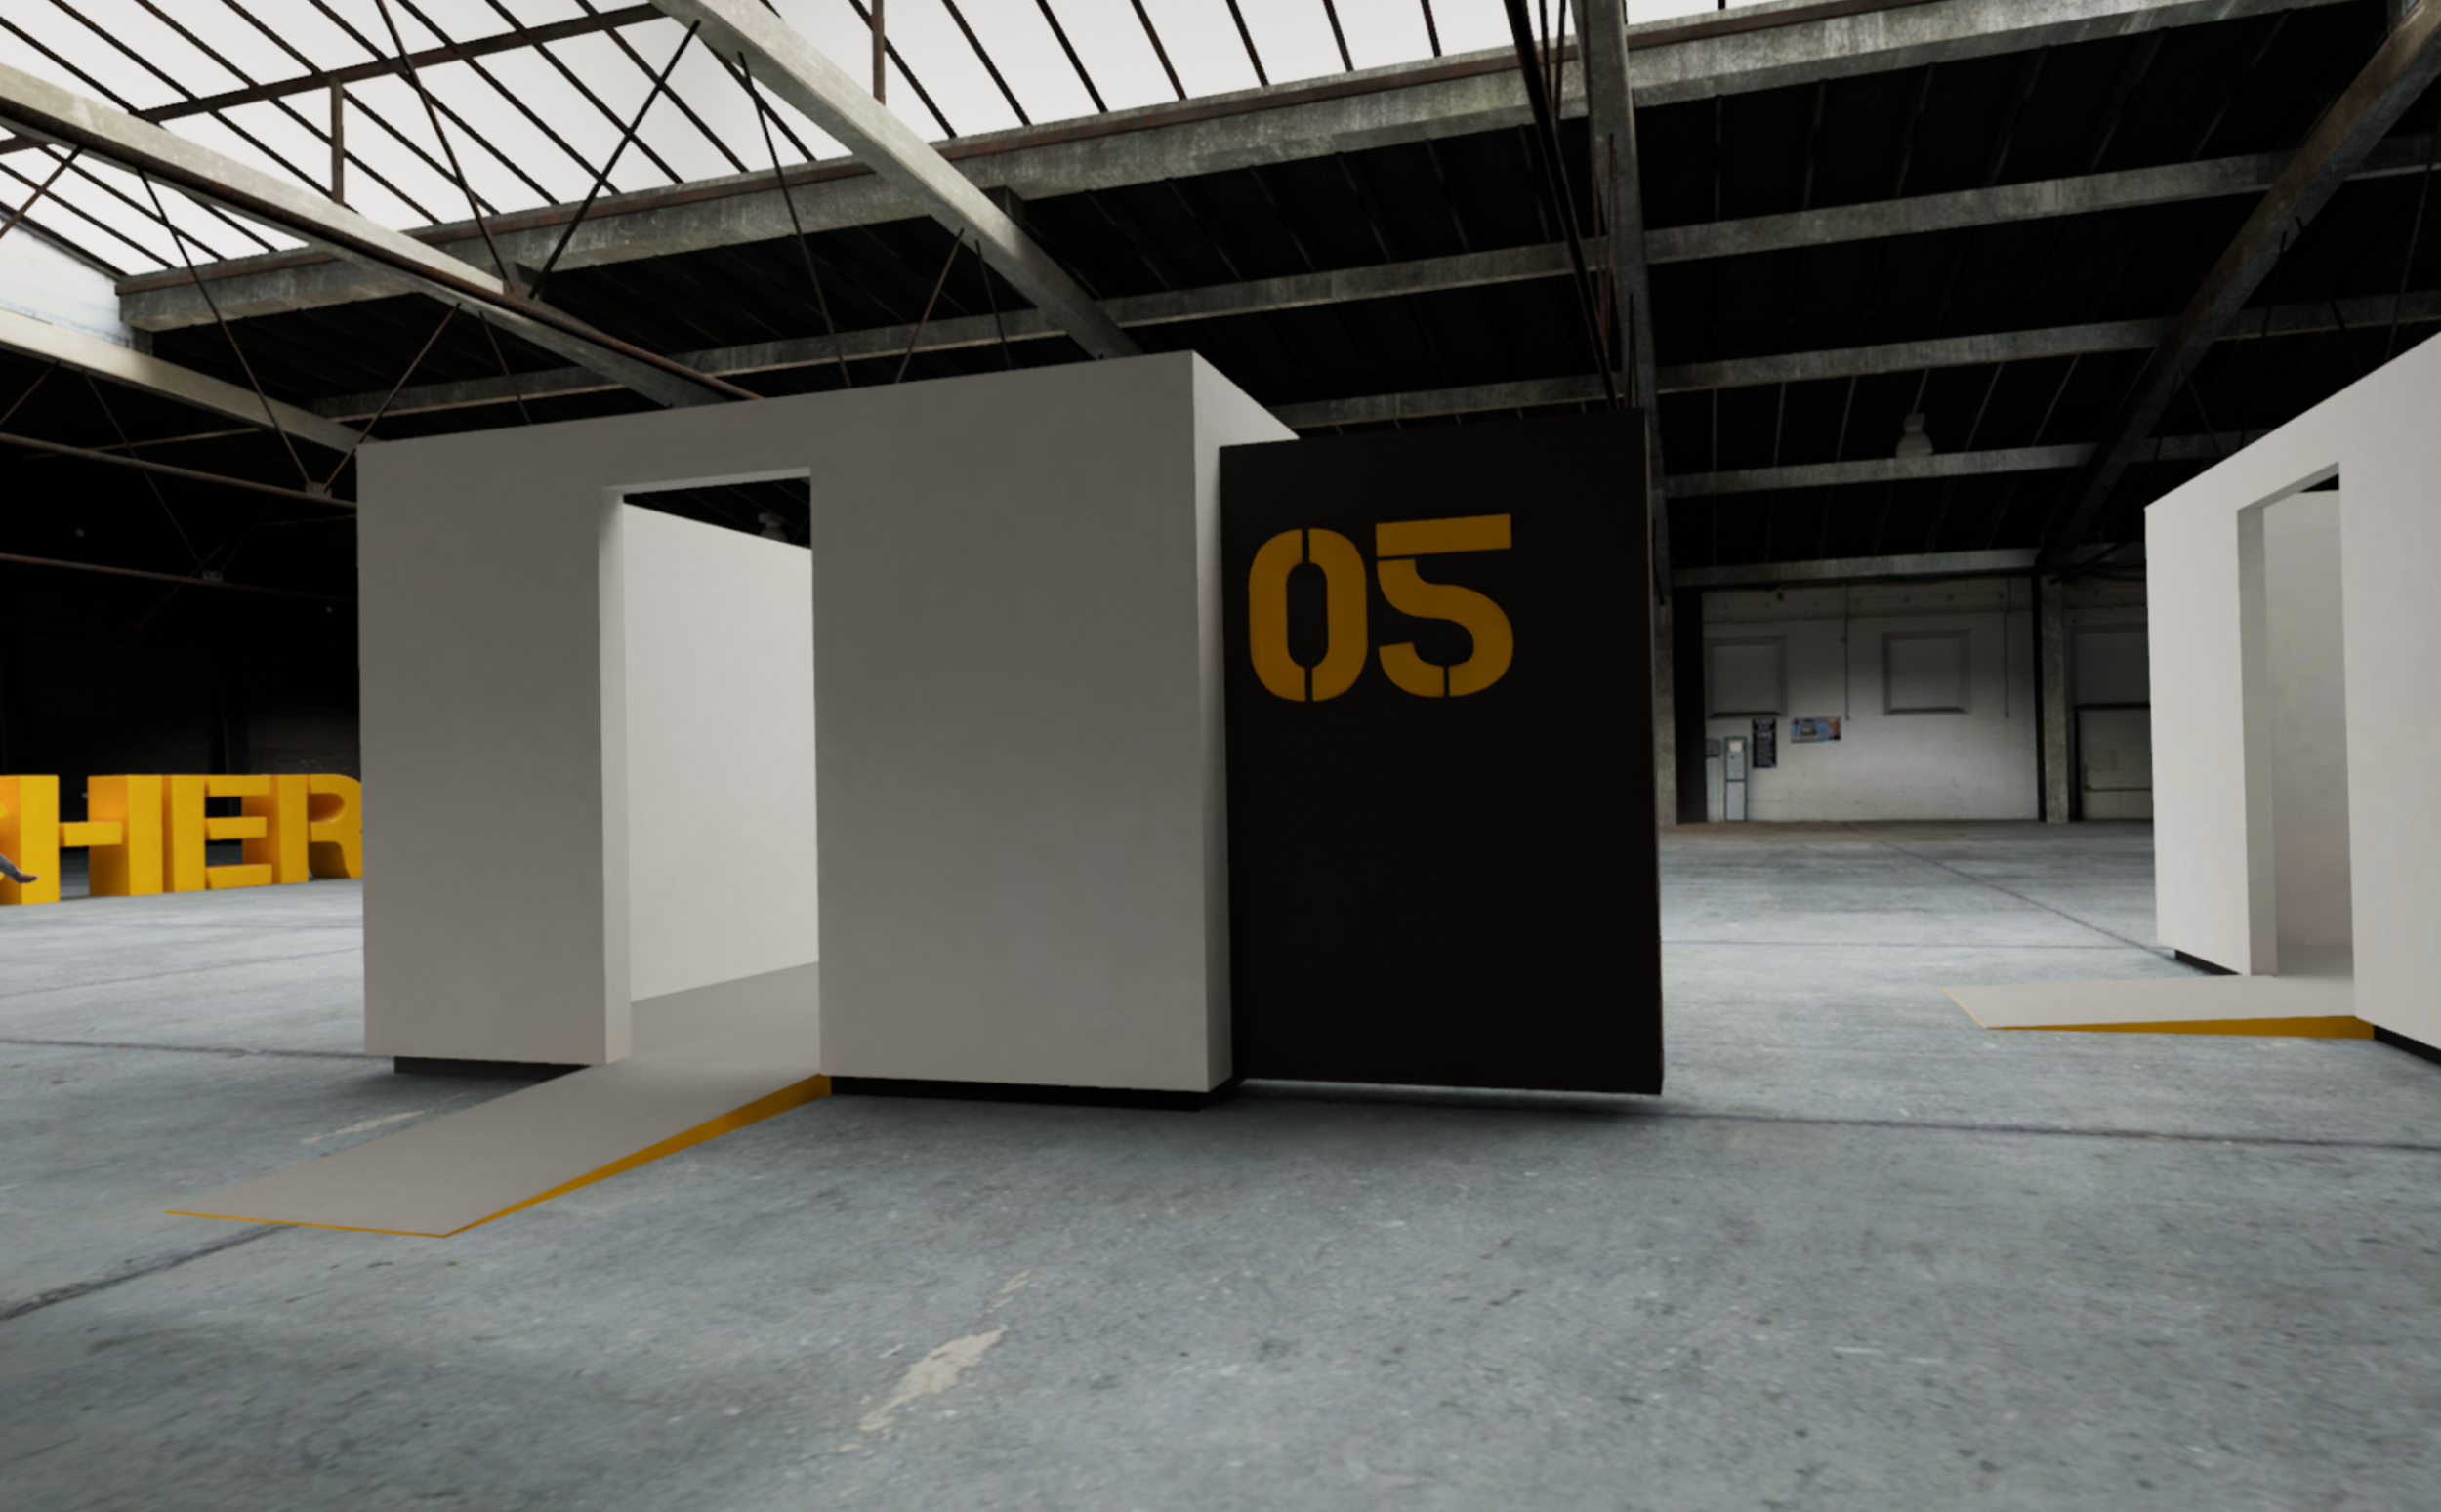

To return to the main menu selection, enter booth number 5 and touch the button at station 05-E.
Alternatively, you can return to the main menu at any time by pressing 'H' on the keyboard.
Airbus Training

Information about the next assembly step can be found on the monitor to your left.
The 'R' key on the keyboard allows you to reset your position as needed.
Pressing the '1' key on the keyboard will return you to the starting position.
The 'ESC' key exits the application and returns you to the desktop.
After successfully completing the training, you will be asked if you want to return to the main menu.
You can confirm this choice with the trigger button on the controller.
ÖBB Training
Information about the next assembly step can be found on the monitor to your left.
The 'R' key on the keyboard allows you to reset your position as needed.
White arrows in the scene visually indicate the next disassembly step.
Pressing the '1' key on the keyboard will return you to the starting position.
The 'ESC' key exits the application and returns you to the desktop.
After successfully completing the training, you will be asked if you want to return to the main menu.
You can confirm this choice with the trigger button on the controller.
TMZ Motor Training

Information about the next assembly step can be found on the monitor to your left.
The 'R' key on the keyboard allows you to reset your position as needed.
White arrows in the scene visually mark the next disassembly step.
Pressing the '1' key on the keyboard will return you to the starting position.
The 'ESC' key exits the application and returns you to the desktop.
After successfully completing the training, you will be asked if you want to return to the main menu.
You can confirm this choice with the trigger button on the controller.
Über uns
Die Augmented & Virtual Reality Agentur 3dmacher konzipieren maßgeschneiderte Virtual und Augmented Reality Anwendungen die den spezifischen Anforderungen Ihres Unternehmens entsprechen. Bei der Entwicklung unserer AR & VR Anwendungen steht immer der Mensch im Vordergrund.
Kontakt
Engerthstrasse 141/18
1020 Wien
0043 660 5602145
office@xrmacher.com